Hello kindergarten and first graders! The Hingham Art Teachers have been working hard to give you fun and creative ways to review what you already know about visual art. We understand that different families have different resources at home (so do I!) so you will have choices. These next few days kindergarten and first grade students are working on SHAPES. All the art teachers miss you a lot, and will see you soon!
If you have questions, please ask your parents to email me. I am the art teacher at South, Mrs. Rollins ([email protected])
If you have questions, please ask your parents to email me. I am the art teacher at South, Mrs. Rollins ([email protected])
Robots and Castles and Shapes! (Oh MY!)
|
WEEK #4
OBJECTIVES
Activity 1: scrap cardboard, tin foil(optional),scissors, glue of your choice (tape would also probably work) Activity 2: Paper, black crayon (a pencil would work as well), Washable markers, paintbrush and water(optional). INTRODUCTION 1.Start by going on a scavenger hunt around your house to find some shapes. Try to find at least a circle, a triangle, a square and a rectangle. (Other shapes to try and find: oval, trapezoid, octagon, pentagon, heart, half circle or semi-circle, crescent, stars) 2.choose one of the activities and watch the video which corresponds with that choice. |

|
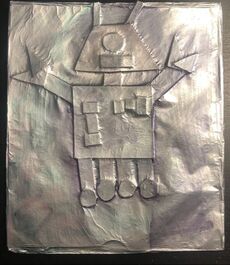
Activity 1: Recycled shape robot.
Activity choice 2: Paul Klee inspired castle
Lines That Wiggle
|
Week #3
Lesson Plan for GradesK-1 OBJECTIVES
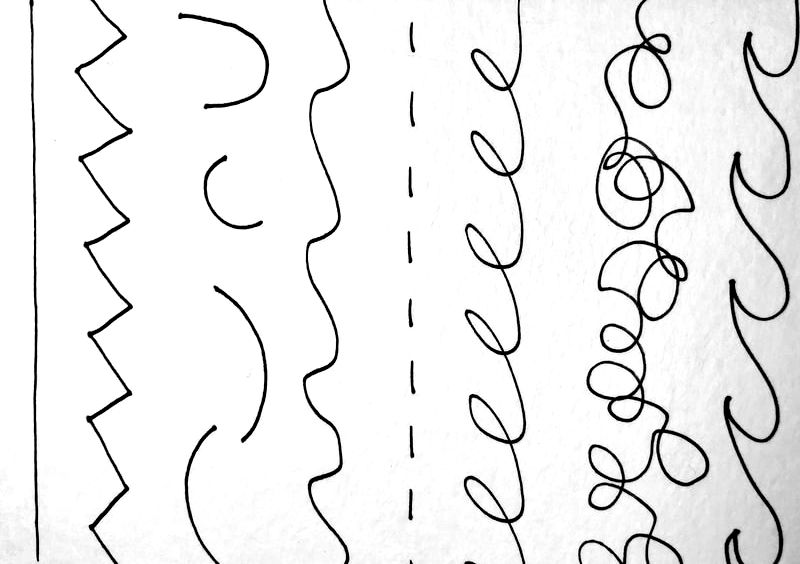
MATERIALS NEEDED Activity 1: Paper and drawing tool of your choice (Pencil, pen, markers all work well!) Activity 2: Paper, pencil, coloring tool of your choice (markers, paint, crayons etc.), sharpie or black permanent marker (optional) INTRODUCTION 1.Start with the Youtube video of Lines That Wiggle 2. Use the following sheet to talk about lines. How many lines can you name? (Parent Cheat sheet: straight, zig-zag, curved, bumpy or wavy, dotted or dashed, loop-de-loop, scribble, wavy) |
|
|
ACTIVITY 1
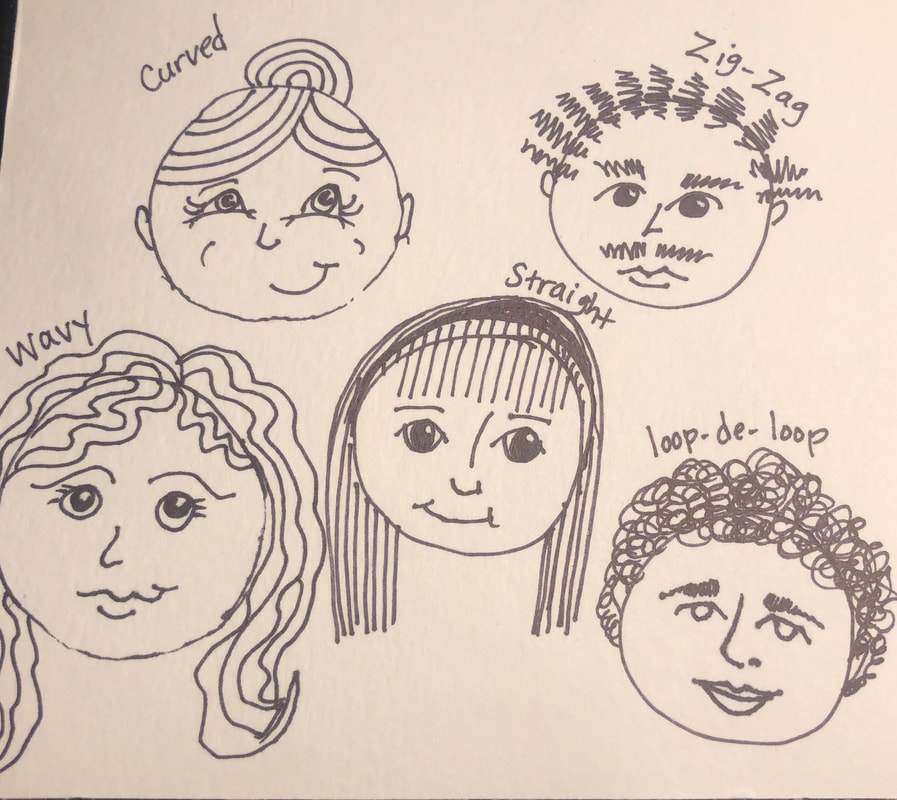
Bad Hair day: 1.Start with a piece of paper. Draw at least 5 circles on your paper that do not overlap. You want them to be about the size of a toilet paper tube. If you have one on hand you can trace one. 2. Start to turn each circle into a face with different hair. On each face focus on one type of line. Try not to mix them (that’s the challenge!). Try to make each face different and add lots of detail. Feel free to do more than five faces if you can! |
ACTIVITY 2
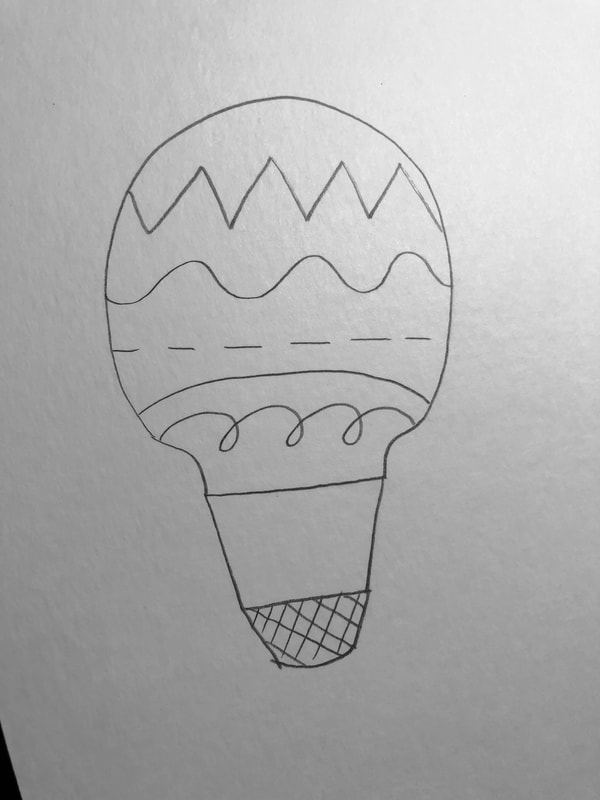
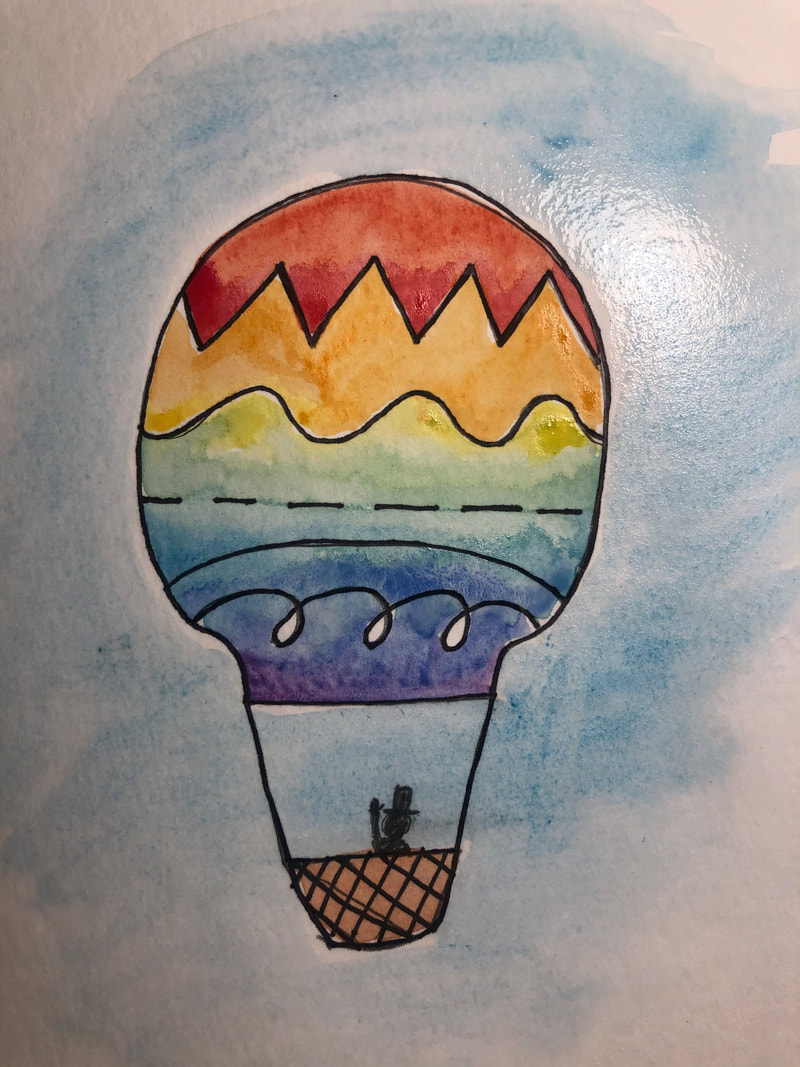
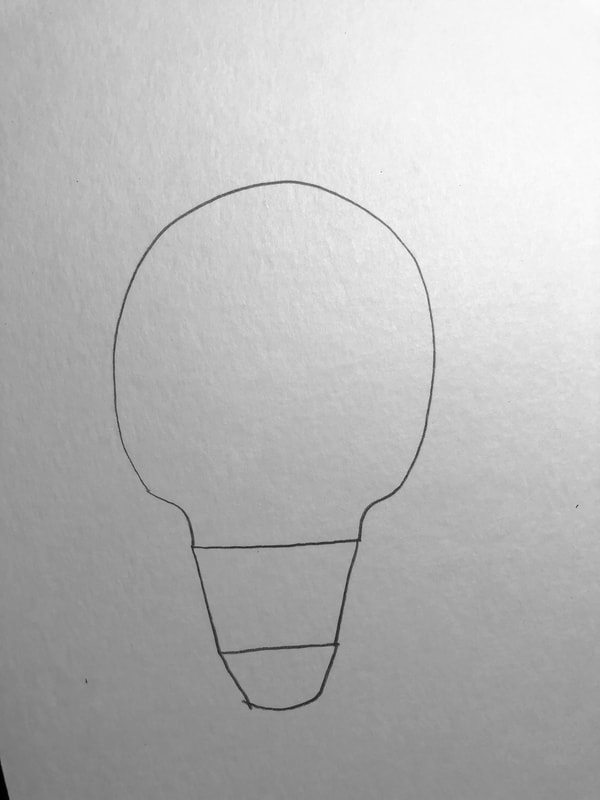
Decorate a hot air balloon with lines:
Use the photos below to draw a simple hot air balloon. Pick at least 5 different lines to draw across your balloon to decorate it. Then color the balloon however you wish! I used watercolor paint and sharpie on mine but feel free to use whatever you have on hand!
|

|
|
Rainbow Review!
|
Week #1
OVERVIEW & PURPOSE Hello kindergarten and first graders! The Hingham Art Teachers have been working hard to give you fun and creative ways to review what you already know about visual art. We understand that different families have different resources at home (so do I!) so you will have choices. These next few days kindergarten and first grade students are working on color. All the art teachers miss you a lot, and will see you soon! If you have questions, please ask your parents to email me. I am the art teacher at South, Mrs. Rollins ([email protected]) OBJECTIVES
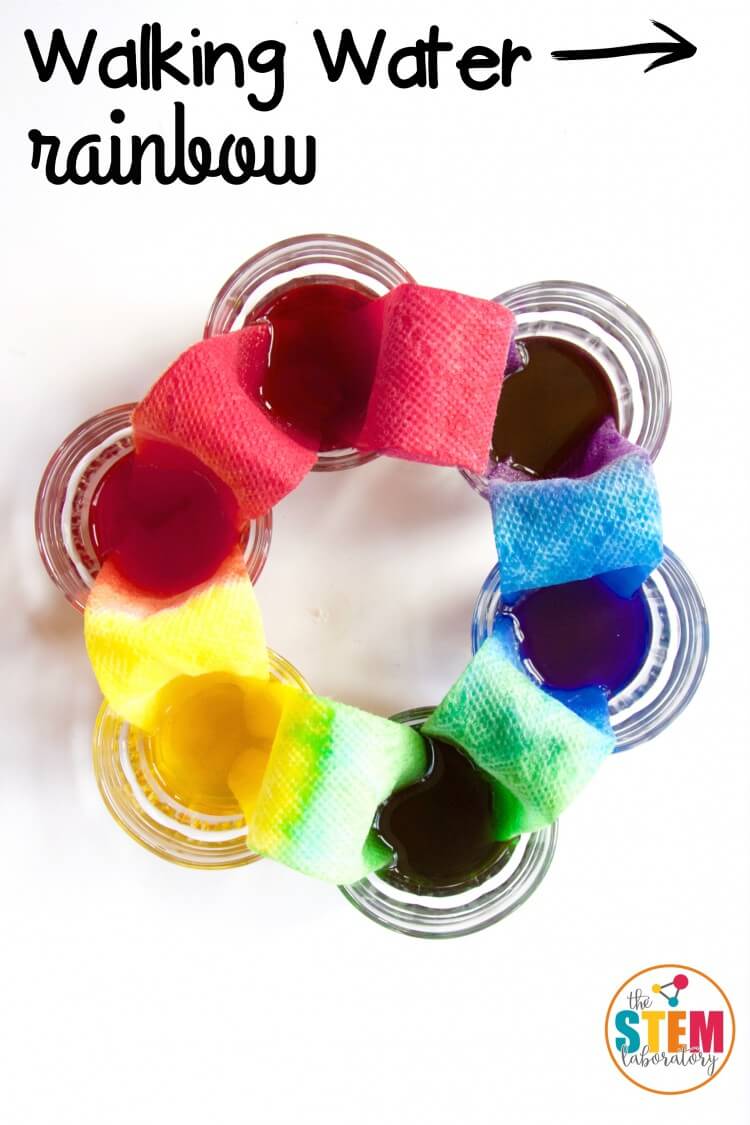
Start with the Youtube video of “ROY G. BIV” by the band They Might Be Giants (it’s a cute one!). Review what the letters ROY G. BIV stand for (Indigo always throws everyone off, but it is a blue-ish purple). You have two options for activities: ACTIVITY 1Create a rainbow using found objects: 1.Walk around your house to find as many single color objects as you can. These can be toys, books, magazines, recycled materials or even clothing. It is ok if they have a little bit of another color on them. 2. Categorize each object by color. Make a separate pile for Red, Orange, yellow, green blue and purple. (If you want a challenge, try to find some indigo items!) 3. Arrange your objects into a rainbow shape on the floor. It can be curved or straight depending on your objects. Take a photo of what you have created! ACTIVITY 2 This is more a STEAM activity, create a Walking rainbow:
|

|
Texture,Texture Everywhere!
|
Week 2
OVERVIEW & PURPOSE Hello kindergarten and first graders! The Hingham Art Teachers have been working hard to give you fun and creative ways to review what you already know about visual art. We understand that different families have different resources at home (so do I!) so you will have choices. These next few days kindergarten and first grade students are working on texture. All the art teachers miss you a lot, and will see you soon! If you have questions, please ask your parents to email me. I am the art teacher at South, Mrs. Rollins ([email protected]) OBJECTIVES
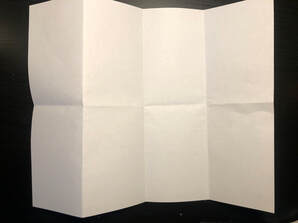
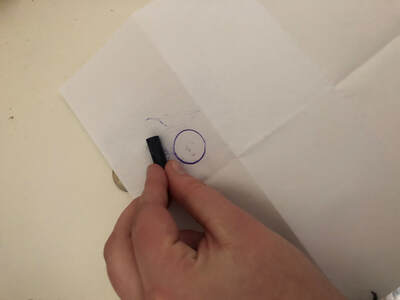
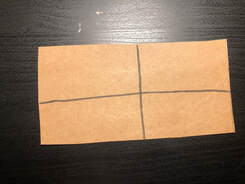
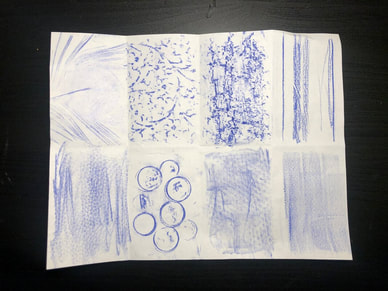
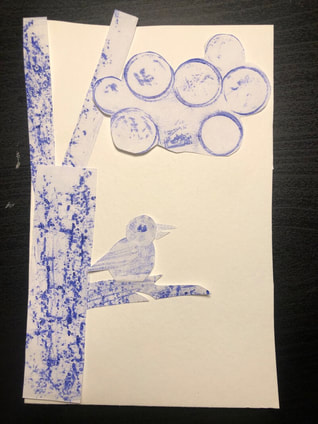
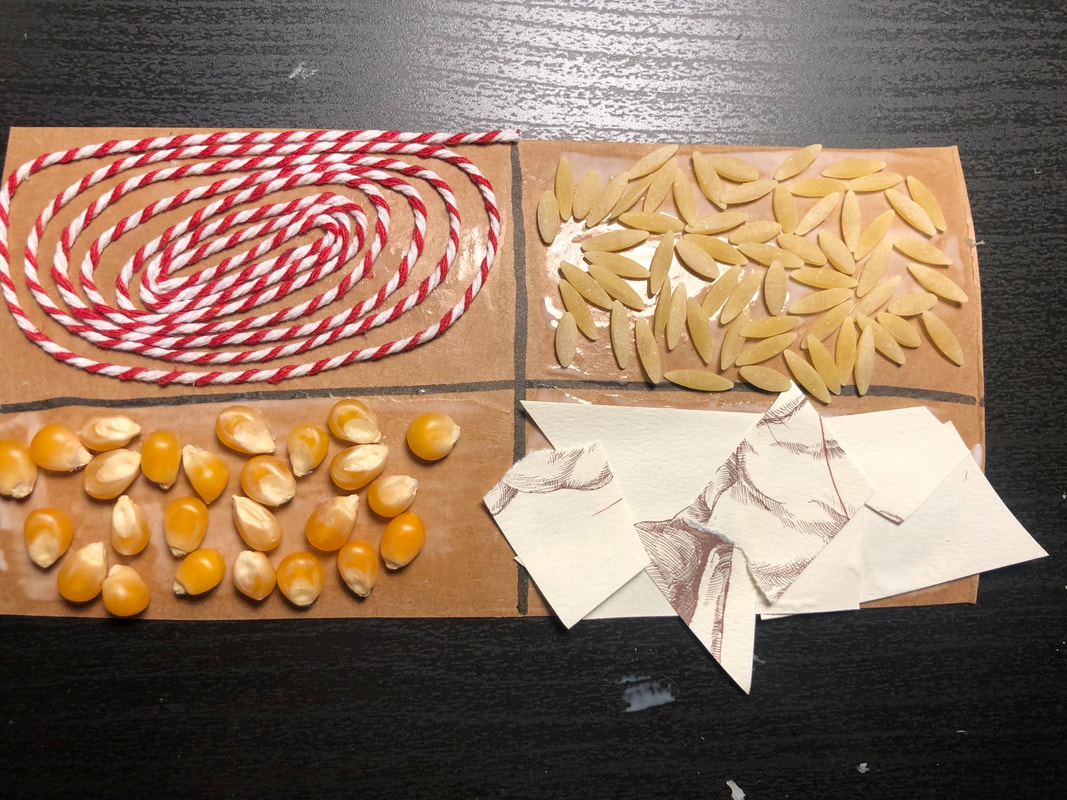
Activity 1: Crayon or pencil, paper, scissors, glue or tape (optional) Activity 2: Recycled cardboard (like a cereal box or something similar), glue, pencil/marker, various materials around your house! INTRODUCTION 1.Start with the Youtube video of Sesame Street’s “Abby Teacher Josh Gad about Texture” https://www.youtube.com/watch?v=CdA4EcEkzzg 2. Take a walk around your house or your yard. Feel for textures on the walls, on the ground, and have your student describe what they feel like. For example: grass is soft, rocks are bumpy, tiles are smooth ACTIVITY 1 Texture rubbing scavenger hunt: 1.Start with a piece of paper. Ideally, thin computer printer paper works the best. Fold the paper into 8 rectangles. 2. Walk around your house and try to find things with texture to make a rubbing of. You can make a rubbing by placing the paper over the texture, then rubbing with the side of your crayon or pencil tip. (Note: crayons without wrappers work best!) 3. Try to find at least eight different looking textures. Use walls, fabrics, or place small items under your paper like coins or flowers etc. 4. Cut up your eight textures to make a texture filled collage! Use another piece of paper to build your design. You can glue or tape it down once you like it, or keep the pieces unglued and challenge yourself to make new pictures with what you have cut out. ACTIVITY 2Create a texture sampler:
|
|